Introduction
The American Society for Nondestructive Testing (ASNT) describes NDT as evaluating materials or components for flaws without damaging them, allowing their continued use. NDT is vital for ensuring the integrity and quality of products in fields like manufacturing and construction. This article highlights the Alternating Current Field Measurement (ACFM), an electromagnetic NDT technique, and discusses using EMS 3D field simulation software to design and evaluate NDT probes.What is ACFM?
ACFM is a non-destructive electromagnetic technique to detect surface cracks in metals, offering advantages like minimal prep and no need for recalibration. It induces eddy currents, with disturbances from cracks altering the magnetic field to indicate crack presence and size. Designing ACFM probes involves optimizing parameters like coil size and frequency, a task made efficient and accurate with EMS software's Finite Element Method (FEM).Example of a Twin Coil Inducer ACFM probe
The ACFM probe, illustrated in Figure 1, features two coils and a magnetic sensor housed in a plastic container. This non-magnetic material allows the sensor to measure magnetic flux density (By) accurately against the test surface. As the probe moves in the designated direction, it typically records a uniform By value unless it encounters a surface crack, which causes By to fluctuate. These changes in By are analyzed against preset benchmarks to ascertain the crack's size. Each coil in the probe is made from 36 turns of 0.5 mm diameter copper wire, operating with an RMS current of 0.6 amps at a frequency of 6 KHz.
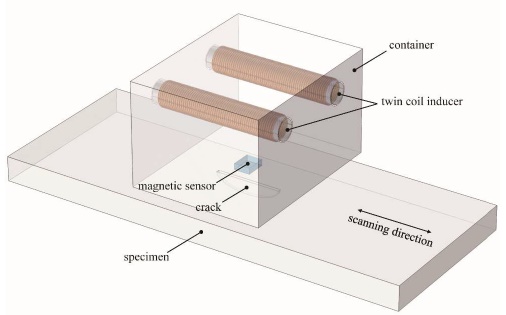
Figure 1 - A model of an ACFM probe
Results from EMS
The results from EMS simulations are displayed in the subsequent figures. Figure 2 illustrates the distribution of current density vectors on the specimen, indicating how electrical currents are distributed across its surface. Figure 3 presents the magnetic flux density (By) observed on the specimen's surface, providing insight into the magnetic field's behavior in the absence or presence of defects. Lastly, Figure 4 captures the variation of magnetic flux density (By) at the magnetic sensor's location as the probe traverses the length of the crack, highlighting how By changes in response to surface anomalies.
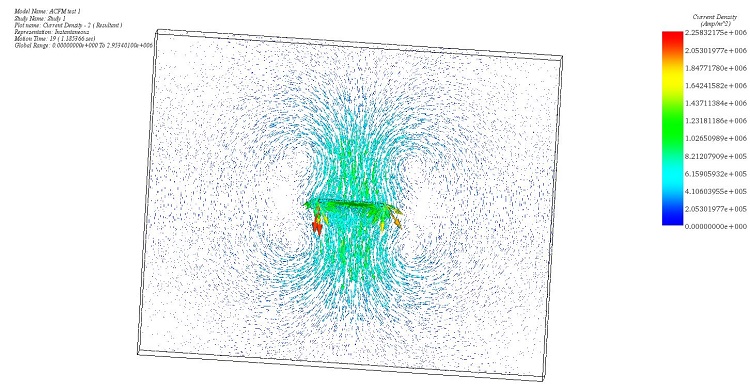
Figure 2 - Current density distribution around the crack
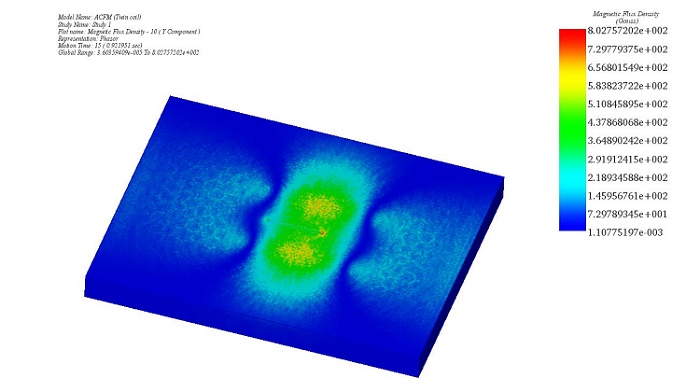
Figure 3 - By distribution on the plate
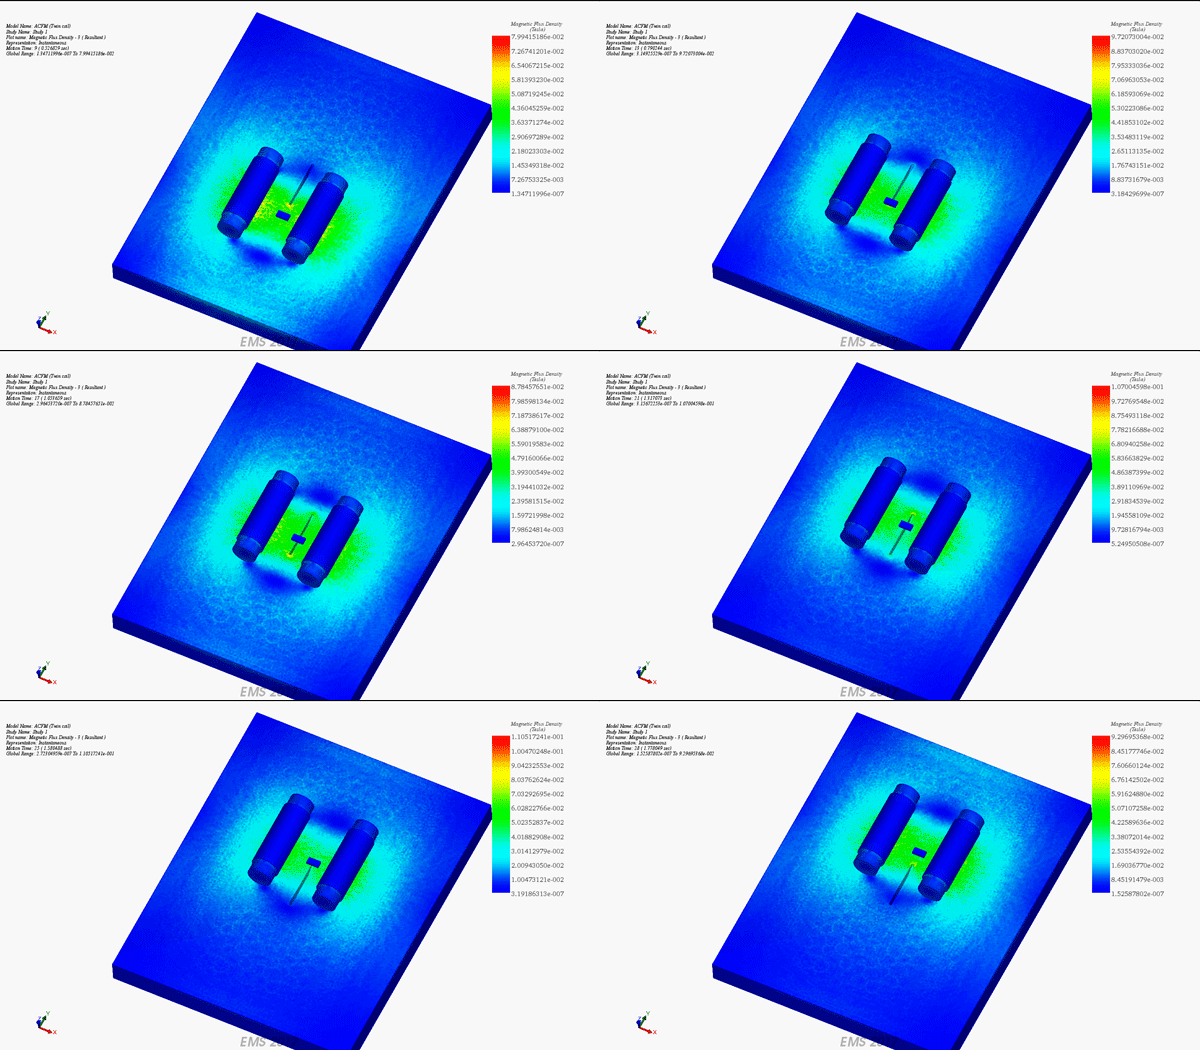
Figure 3-A - Magnetic Flux Density plot
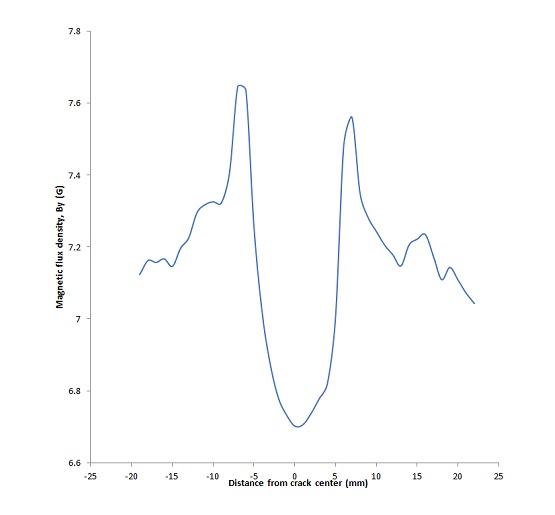
Figure 4 - Variation of By with distance of the probe from the crack
Conclusion
ACFM technology stands as a pivotal advancement in nondestructive testing (NDT), offering a robust solution for detecting and measuring surface cracks in metals. This method, characterized by its minimal preparation requirements and precise detection capabilities, leverages electromagnetic principles to identify defects that could compromise material integrity. Through the integration of EMS software for probe design and optimization, ACFM technology enhances the reliability and efficiency of NDT applications across various industries, ensuring materials meet stringent quality and safety standards. The exploration of ACFM and its applications reflects the ongoing evolution of NDT methodologies, highlighting the critical role of technological innovation in maintaining industrial material integrity.